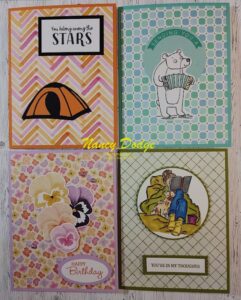
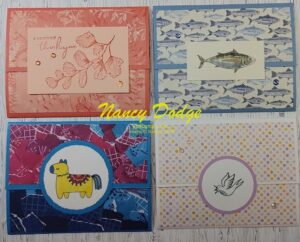
On Facebook Live on January 1, 2023, we ventured through the clues to make the following cards. I always try to make something easy & quick to show my fellow crafters that it doesn’t have to take an hour to make 1 card. Next Mystery Card on Facebook Live is February 5, 2023 at 7pm.
Supplies Needed:
- 1 – 5 ½” x 8 ½” card base, scored at 4 ¼”
- 1 – 4” x 5 ¼” DSP
- 1 – 5 ¼” x 6” cardstock, scored at 2” & 4” (along 6” side)
- 2 – 2” x 5 ¼” DSP (same or coordinating)
- 2 – ½” x 4” cardstock, scored at 2”
- Scrap white or vanilla cardstock big enough for your chosen die and/or sentiment banner
- Coordinating Ink
- Stamp set with Images & sentiments
- Die cut of fussy cut coordinating images
- Die (to coordinate with stamp set or as banner for sentiment)
- Adhesive of choice
- Stampin’ Cut & Emboss Machine
- Embellishments
- If using an image that you will color in, make sure you have Memento & markers
Directions:
- Fold 5 ¼” x 6” cardstock opposite ways (like a “Z”)
- Adhere 4” x 5 ¼” DSP to front of card (portrait position, adhesive around the edge & “X” in the middle)
- Stamp image or sentiment on scrap cardstock that fits your chosen die
- Place die over card front & secure with post-it note or post-it tape, run thru the Stampin’ Cut & Emboss Machine, then fold your car base.
- Using same die, cut a piece out of your stamped white or vanilla scrap
- Adhere the 2 pieces of 2” x 5 ¼” DSP to the right & left side of the folded 5 ¼” x 6” cardstock (mountain on left, valley on right) NOTE: you may add a 2” x 5 ¼” white/vanilla piece of cardstock to the middle section if desired
- Put adhesive on the back of the right cardstock side & adhere to the inside right of the card, there will be a ⅛” gap around the right, top & bottom sides
- Fold ½” x 4” strips along score, add adhesive to ½ of each of the outsides and adhere to underside of left of the mountain so fold is along the outer edge
- Add adhesive to the other outside of strip, fold the “Z” up, if strips go beyond the center crease, snip a bit off, then fold card to adhere strips to inside left of card base
- Close card & add adhesive to the exposed half of the DSP, line up die cut & press to adhere
- Embellish as desired.


